Friday, January 04, 2008

Best ever baked donuts


You need a donut cutter to make these yummy donuts.
*
Ingredients:
2 packages (1/4 oz each) yeast
1/4 cup warm water (110-115 degrees)
1 1/2 cups warm milk
1/3 cup shortening
1/2 cup sugar
2 eggs
1 tsp salt
1 tsp nutmeg
1 tsp cinnamon
4 1/2 cups four
1/4 cup melted butter
*
GLAZE
1/2 cup butter
2 cups confectioners sugar
5 tsp water
2 tsp vanilla extract
*
In mixing bowl disolve yeast in warm water. Whisk. Add warm milk & shortening - mix for 1 minute. Add sugar, eggs, salt, nutmeg, cinnamon and 2 cups of flour - beat on low speed until smooth. Switch to dough hook. Mix in the rest of the flour to form dough - add a bit more flour if necessary. Do not knead the dough! Cover with a dish towel and set in a warm place to rise for 1 hour - it needs to be in a fairly warm spot in order to double in size.
*
Punch the dough down and gently knead. Roll out to 1/2 inch thickness on lightly floured counter. Cut with donut cutter and put on cookie sheet lined with parchment paper. Brush with butter.
*
Cover and let rise in a warm place until doubled - about 30 minutes (confession time here - I forgot to do this step in the batch in the photo which is why they look that way - but they are still very yummy, so the batch wasn't ruined, just a bit different.
*
Bake at 350 for 20 minutes or until light tan.
*
GLAZE: In a small saucepan melt butter; stir in sugar, water and vanilla. Whisk over LOW heat until smooth. Dip warm donuts in glaze - it helps to have a pair of kitchen tongs to do this and place, glaze size up on a wire rack to cool. You might want to spread newspaper under the rack 1st to speed clean-up. Makes about 2 dozen, plus the donut holes!

Monday, October 08, 2007

A favorite side dish for Bar-B-Que!


This is one of my favorite side dishes for anything bar-b-qued - think grilled steaks, chicken, shish-ka-bobs, ribs...
*
It is actually better to use tomatoes that are a little bit firm.
*
Slice them in the morning, alternating with mozzerella cheese and diced sweet purple onion. Drizzle good olive oil and balsamic vinegar over all. Seran wrap and stick in the fridge until about 2 hours before you want to eat - then take it out and set on the counter and let come to room temperature.
At least, that is my method because I usually have a bit of time in the morning to prep something. If you have a different schedule - then adjust. It is better if you have at least 1 hour so the tomatoes can absorb the flavor.
*
If you live in New England, near a Stop & Shop - they have an excellent line of "gourmet" foods now - I think it is called Simply Stop & Shop or something like that... but they have a very yummy basil olive oil that is soooo good. This olive oil is particulary good with this dish. I also keep a jar of olive oil that I put sliced garlic and herb in - you can make your own flavored olive oils, but whenever you see one that is already made - it is usually worth trying out!
*
In my photo - that is 1 tomato - it is enough for 2-3 servings.
*
Make sure you serve this with some crusty bread because the left-over olive oil/balsamic vinegar makes an excellent dipping sauce!

Saturday, October 06, 2007

My Rum Cake

*

*
*
*
*
*
*
*
*
*
*
*
*
Not long ago I posted something about making this cake on my quilting blog, and some expressed an interest in the recipe. Believe me, this is not a difficult cake to make (I make it with "help" from my 4 year old son), it tastes great - even if it is a few days old (especially with your morning coffee), and it serves lots of people... at least 18 servings! It is a pound cake, but very moist inside. And the rum taste is evident!


Here is the recipe - I write my recipes as I use the ingredients - because I pre-measure everything. Besides, if I write down 3 cups of sugar - that is what I use - in the beginning - paying no head to the fact that I was supposed to save 1/2 cup for the egg whites. So, yes - you see 2 1/2cups of sugar and than 1/2 cup of sugar - that is just the way I cook...


This is one of those recipes where it is helpful to have a big mixer (for the batter), a small hand-held mixer - for the egg whites, and a seperate BIG mixing bowl (to blend the batter with the egg whites). This BIG mixing bowl can be one of those cheap commerical kitchen type bowls...


To make the cake:


1 cup butter - room temp.

2 1/2 cups sugar

6 eggs yolks - room temp.


3 cups flour

1/4 tsp. baking soda


8 oz container of sour cream


1 tsp vanilla extract

1 tsp lemon extract


6 egg whites - room temp.

1/2 cup sugar


So, you don't have time to wait until your butter comes to room temp in order to cream? Put it in the microwave for about 22 seconds - the edges will melt, but the center will still be solid enough and when you cream it with the sugar it will be just fine. Just don't nuke the butter until it is all melted because then it won't work. Eggs I find work OK even if they are a little cold, but good luck trying to cream COLD butter!


1. Mix butter with 2 1/2 cups sugar, beating well. Add egg yolks and beat well.


2. Add flour and baking soda - alternating with the sour cream and mix until just blended well. Add your extracts.


3. In a seperate mixing bowl beat the egg whites until foamy. Add sugar a bit at a time until stiff peaks form. Don't know what stiff peaks are? Well - if you can stick your finger in the stuff and your finger indent remains intact - that is perfect.


4. Fold the egg whites into the batter - this is where the BIG mixing bowl comes in handy - to blend the 2 mixtures. What is "folding" - this means just mixing the 2 things together until just mixed - don't stir and stir and stir here, ok?


Bake at 325 degrees for about 1 1/2 hour (in a household oven) in a greased and floured tube pan. That means - crisco the pan and then lightly flour. My original recipe calls for a 10" tube pan, but I really have no idea what that means - I just use the same old tube pan I've always had. My pan is nifty - it is a 2 piece pan so I am always assured of getting that cake out of there somehow!!! My oven doesn't take so long because it is a convection oven. Basically - after 1 hour open up the oven and take a look. Then guage. Then start watching and after it looks like the sides are pulling a tiny bit away from the edges of the pan - poke with a shish-ka-bob stick to see if any batter is on the stick. Batter = cook longer. No batter - it is done!


Now I put the entire pan on top of a wire cooling rack for 10 minutes. Invert onto the a LARGE platter. Poke full of holes with that shish-ka-bob stick - at about 1" intervals and pour the hot rum glaze over the entire cake. Of couse - mostof it slides right off the cake - take a soup spoon and keep scooping it up and putting it back on top of the cake until the mixture cools too much and it impossible to scoop - or until you are tired of scooping! Basically - the more hot rum glaze you are able to put on the top of the cake, the more the cake will absorb the glaze down into it. The glaze all pooled at the bottom won't do much good.


Did I mention that this cake is absolutely fabulous even a few days after the fact (just put it in the fridge). So - go ahead and make it ahead of your big event, whatever that may be!


RUM GLAZE


Got to have this recipe too...


I use a very strong, 80% proof rum from Austria - it is typically used for making rum balls and also in hot tea, but I think it would be good with any rum...


1/4 cup butter

3/4 cup sugar

a little less than 1/2 cup of water


1/4 cup rum


1/2 cup chopped walnuts


Bring 1st 3 ingredients to almost a boil for about 3 minutes.


Turn heat way down and add 1/4 cup of rum - be careful pouring because it will tend to fizz up a bit. Simmer for another minute.


Add the walnuts and then immediately pour over your cake. Spoon any glaze back up onto the cake - 3, 4, 5... times!
A NOTE about seperating eggs:
I always crack and also seperate my eggs over a small bowl... by working egg by egg - in a seperate bowl - you have much better control over the situation if there is a bad egg, egg shell or the yolk breaks. And - you never kn0w - you just might end up with a double yolker sometimes! AND - working with a very enthusiastic 4 year old who likes to "help" break the eggs - we usually get egg shells, so this method works best for me!

Wednesday, August 29, 2007

Orange Chocolate Mousse and technique


Excuse the sloppiness of presentation, but please let me present - chocolate orange mousse.


This is one of those recipes where it is handy to have 2 food processors, but 1 will do just fine.

First, I chill the processor bowl and blade in the freezer. Chilling the bowl/blade makes a better whipped cream, I think. Make 1 batch of whipped cream using 1 cup of whipping cream. Put this in a large mixing bowl in the fridge, and I know that a large bowl for this amount of whipped cream seems silly, but it will save you from dirtying another bowl later on. Make a 2nd batch of whipped cream - again using 1 cup. I put in about 1 tsp of orange extract. If you have a 2nd food processor - just set this bowl in the fridge - if not then you put this whipped cream in a small bowl in the fridge and clean the food processor because you need it again for the chocolate part.

Maybe I am getting ahead of myself here and should start with the recipe?

1 tsp grated orange rind

1/4 cup firmly packed sugar

2 egg yolks, plus 2 eggs

6 oz. semi-sweet chocolate squares (from the baking section), melted and cooled

1 TBS orange juice

1 cup whipped whipping cream

More whipping cream for the topping, plus mandarin oranges for the garnish

It is enough to make at least 9 small servings. But, hello! this is a fairly rich dessert and usually people are full by dessert, so a small serving is just fine. If you want bigger servings, use less cups.

Combine orange rind, sugar, egg yolks and eggs in processor and blend until well mixed. Add chocolate and OJ; and mix until well blended. Fold in mixing bowl with whipped cream. * Important to see my note about raw eggs at the bottom!

Spoon mixture into dessert cups and chill to set. Top each serving with whipped cream and oranges.

OK - sounds simple enough, right?

Except - do you immediately know that you should melt the chocolate first? I only 1/2 melt it and stir with a tiny little whisk. I move the pan completely off the burner and let and let heat from the pan finish melting the chocolate, giving it a little stir every now and then to make sure it is completely melted.. I use a very thick, heavy pan - because chocolate will burn very quickly in a cheap pan. And burnt chocolate is not yummy, which is why I never completely melt it over the flame in the first place. Now - when the chocolate is cooling I will make the whipped cream - setting the plain whipped cream in the bigger bowl so that later - when I come to the folding in part - it will already be in the correct size bowl.

To get the orange rind off the orange I use a hand-held gadget that looks like a small cheese grater. You have to be careful not to get the pith - because that it bitter. 1 orange will be about 1 tsp. of rind. You can use the orange for something else later.

Following the directions, I will mix the stuff in the food processor. Now - time to add the chocolate and OJ - but WAIT!!! It is important to check that the chocolate has cooled off enough so it won't instantly cook the eggs way more than what you want them to be. But - it still has to be warm enough to pour. Why don't recipes have helpful little hints like this in their directions. I wonder how many people over the years have cooked the eggs into solid chuncks when making this?

Oh - and don't forget to make this the day before you want to eat it - so it has time to set nicely. And - when setting this many dessert cups in the fridge - it is nice to use a tray (just like I use a cookie sheet to put lots of baked potatoes in the oven). If you don't care about presentation - just laddle the mixture into the cups with a small laddle - if it is important not to have drips - then you have to use a laddle, swipe it across your drip plate first and then laddle into the dessert cup. Obviously, this time around, I wasn't caring about the drips - and your family and good friends won't either! But if you are going to be making this alot and really don't want drips... well - there are other ways.

Easy enough to change this recipe around a bit - you can used sieved raspberries (use vanilla extract in the topping whipped cream instead of orange, in that case), or purreed bannanas, use different juice, etc. Strawberries, raspberries, mint leaves, candied orange peels, etc. all make fine garnishes. You can make a fruit purree and put a little over the top... Just try to make sure that all the ingredients "jive" together. But cooking is a bit about experimenting - you don't have to follow this recipe exactly - feel free to change it around a bit.

Oh, and please don't give me any lectures about eating raw eggs - think hollandaise sauce, ceasar salad dressing, etc. Yum.

THAT being said - this is an OLD recipe and we all know that egg products should be cooked. I don't think restaurants serve caesar salad dressing made with raw eggs anymore. And mousse and hollandaise sauce - the eggs are cooked over a pan of hot water until 74 - 75F is reached.

Thursday, June 14, 2007

Party Sandwiches

We had a party last week and made 7 sandwich platters. This is the "egg" tray - egg salad decorated with cheese, cucumbers, red onions, peppers, etc. We also had trays of roast, ham, pastrami... as a decoration for the meat sandwiches we like to use sliced egg (get yourself a nice egg cutter!), plus everything we use on the egg ones.


These sandwiches are very economical to make, look pretty and taste great. Actually, the egg ones are my favorite the next day for breakfast.

What else did we serve? We kept it simple with meatballs (in the crockpot), chicken skewers - we prepared the chicken ahead of time and baked 1 tray at a time. then placed the skewers on an electric hot plate to keep warm), green salad, fruit salad, shrimp coctail and clam chowder. We discussed the idea of a potato or pasta salad too, but didn't. It is a pretty safe menu, enough to satisfy both the vegetarians and meat eaters for a little social get-together.


Saturday, June 09, 2007

Fast Strawberry-Rhubarb Pie


*
*
*
*
*
*
*
*
*
*
*
*
Someone was over the other day and watched in amazement as Little Boy and I very quickly made this pie. This is definately a "kid" friendly recipe because you can actually get it done before they lose interest! We have rhubarb coming out our ears this time of year and this recipe is a favorite!
*
Here's what you need:
Pre-made double pie crust
1 cup sugar
3 cups chopped rhubarb
1 cup strawberries in light syrup - spoon off a little of the syrup though
2 eggs
1/2 teaspoon cinnamon
3 Tablespoons flour
1-2 Tablespoons butter
*
* - About those strawberries - of course, you can use chopped fresh ones, but many times our grocery store does not have fresh strawberries, so we get the frozen ones instead, which work just fine too! Oh - and it is a bit faster than chopping strawberries. AND - the extra left-overs are sooooo good on vanilla icecream with a nice slice of this pie!
*
OK - thaw out the pie crusts, but don't let them get too warm, ok? About 15 minutes should do it.
*
Mix sugar, flour and cinnamon together. Add eggs and beat altogether. Stir in the rhubarb and strawberries.
*
Pour mixture into pie crust. Cut little chuncks of butter and put over the top of the mixture. Invert 2nd pie crust over top one (this is where it gets "sticky" if your pie crust is too warm, which can make it a bit hard to get out of the pie pan). If it rips a bit, just moisten your finger and "patch". Crimp edges with a fork. Cut good sized slits on the top of the pie with a butter knife - wiggling it back and forth a bit to open the slit up.
*
Rip 3 pieces of tinfoil, each about 4". Wrap the tinfoil around the outside edges of the pie.
*
Bake at 400 for 45 minutes (on a cookie sheet).

Tuesday, June 05, 2007

Left over grilled steak salad plate


A great summer dish - next time you have the grill on - throw on an extra steak. After it is cooled, slice it very thin. I love it a day or two later with a variety of salads (tonight's salads were purchased macaroni and purchased potatoe salad, a tossed green salad, and cucumber salad). Because it isn't too hot to run the oven yet - we also had baked garlic bread. Yum! A perfect summer meal!
Cucumber Salad - well, I grew up on sliced cucumbers in vinegar with a sprinkle of pepper - for sure this must have been served just about every day - either with lunch or supper. And that is good - very good, and healthy too. BUT - if you don't care about a few extra calories.... try this - thinly sliced cucumbers stirred in sour cream with probably just less than 1 TBS vinegar. Add some fresh dill if you have any - it looks pretty. And - just before serving - grate a bit of salt over it. Don't add the salt early or your cucs will get watery.

Monday, February 05, 2007

Weekly cooking

No photos, sorry, but I thought I would at least post some of what I've been cooking, not that it seems very exciting, but all these meals are fairly fast and easy to make - all within 1/2 hour to 1 hour and there is enough variety to keep things interesting...


Night 1:

Pot roast - I cooked this in the crockpot on high for 4 hours - I added 1 cup of water mixed with an envelope of pot roast seasoning, plus 1 bag of baby carrots. To serve - remove the meat to cutting board and slice - put on platter. Put carrots and gravy in a bowl. Serve with plain egg noodles tossed in basil/garlic olive oil. I also made an artichoke/spinach casserole that I was experimenting with. This was a really good meal with very little work!


Night 2:
Chicken drumsticks - these were on big time sale at the grocery store this week! I froze 1/2 of them and cooked 1/2. I bought a pre-seasoned mix - country chicken. You combined the mix with water and put everything in the handy-dandy oven bag and baked it. I also made rice - got to have something to sop up all that gravy, butternut squash and brocolli, buttermilk biscuits.

Night 3:
Boneless pork chops - again on sale this week and I bought a big family pack and froze most of them. I baked them in a covered casserole dish with a can of cream of mushroom soup, plus the left-over rice - gravy again! Served with acorn squash. I also made carrots - both my son and Dad love carrots boiled to death with butter. I saved the water for soup. I know, I know - 2 orange veggies, but they are yummy! Apple sauce.

Night 4:
German weistwurst - or is it bratwurst? The light colored sausage. Served with potatoe salad, bread and butter and dill pickles, plus frozen vegetable mixture.

Night 5:
Soup - I combined the left over squash, a little of the rice and vegetables, plus the gravies from the drumsticks and pork chops - added the carrot water... pureed it all with one of those hand held stick blenders - that was my base. Now, I added cooked carrots, corn, peas, more rice and the left over drumsticks - chopped. Served with grilled cheese sandwiches. That pretty much empties the fridge of left-overs!

Night 6:
We went to my sister's for pizza!

Night 7:
A pre-cooked roasted chicken picked up from the grocery store, sweet potatoe, acorn squash, a frozen vegetable mixture. Apple sauce.

Night 8:
Fried chicken tenders - I set one aside for my 3 1/2 year old son who prefers plain food. The rest I chop and add to a frozen stir-fry vegetable mixture, plus I add 1/2 a can of chunk pineapple. I add a bit of terriyaki sauce and plum sauce, but you can also use your favorite stir-fry sauce. Served with rice.

Night 9:
Baked porkchops - I make stuffing from a box - then put the porkchops in a oiled casserole dish - put the stuffing on top and bake (covered) at 450 for 1/2 hour, 350 for 15 minutes and then uncovered at 350 for another 15 minutes. Served with mashed potatoes, carrots mixed with frozen peas/corn mixture and extra stuffing on the side. Apple sauce.

I think that's it for the week and I am fairly sure that is the correct combination of things! I go shopping 2X a week, but here is a pretty decent breakdown, minus juices, desserts, breakfast, lunch, snacks, etc.!!!

Shopping list:
Pot roast
Chicken drumsticks
Chicken tenders
Boneless pork chops
Bratwurst
Roasted chicken

Carrots
Baby carrots
Yams
Potatoes
Butternut squash
Acorn squash
Brocolli

Frozen veggie mixtures
Frozen stir-fry veggies

Chunk pineapple
Dill pickles
Potato salad
Buttermilk biscuits
Apple Sauce

Pot roast seasoning mix
Country chicken in an oven bag mix
Stuffing mix
Cream of mushroom soup
Stir fry sauce
Rice

Bread
Butter
Cheese for grilled cheese sandwiches

Sunday, December 31, 2006

Potatoes you won't be able to stop eating!


This is one of those dishes that my DH and I dipped our forks into - just for a taste to see how it is - and before we knew it - we had eaten 1/2 the dish. Yikes! Trust me - you won't be able to stop at just 1 bite once you start!


We used 2-3 oz speck, mushrooms, olive oil, garlic clove, italian dry seasoning, 1 lb potatoes, 8 oz (2 balls) mozzarella cheese (sliced), 3 oz Gruyere cheese, 1 pint whipping cream.


Saute karreespeck (this is a smoked and then air dryed - very similar to pancetta if you can't get speck) in olive oil. Remove from pan. Next add a little bit of that red wine you are drinking to the pan to deglaze it a bit and then saute sliced mushrooms (about 4.5-5 oz) in the oil/wine mixture. Add 1/2 chopped garlic clove and about 1 tsp. of Italian dried herb mixture - stir and then stir the speck - then set aside this pan for cooling.

Now - butter a medium casserole dish. Cover the bottom with a layer of thinly sliced potatoes (our other kitchen has a great mandoline, but alas, we suffer the multiple kitchen syndrome, so DH had to cut all those potatoes!). Layer mushrooms, mozzarella and a bit of Gruyere cheese, start again with potatoes and keep layering until everything is gone - ending with the potatoes. Pour whipping cream over the top and put a bit more cheese on top for good measure.

Cover with foil. Bake for 2 hours at 325.

Love it, love it, love it. Now - trying to decide what to serve it with? Double dipped Southern fried chicken? Prime rib? Gosh - if no one is looking - just eat it straight out of the pan! Variations... we are going to try a vegetarian version with chick peas instead of the meat - might add roasted red peppers for flavor to make up for omitting the speck - served with roasted eggplant...


Friday, December 29, 2006

Lamb chops & brocolli mold?


My husband and I enjoy spending time over the winter experimenting with new recipe ideas... and high on our list this winter - inventive ways to serve basic vegetables. With that in mind - we have started to experiment with brocolli and this is our first attempt, but certainly not the final product. But, you got to start somewhere and for us -that means starting at the most basic starting point and adding from there.

1/2 lb of brocolli - cook this in boiling water. Drain. Puree with either a food processor or one of those hand-held stick blenders. We often use the hand-held stick blender for puree foods - it is great for soups! Mix in 2 eggs. Pour into buttered ramkin. Put in hot water bath (about 1/2 way up the side - we started with 2/3, but decided that was too much water once it started to boil and then had to take some water out!). COVER the pan. Boil for about 20 minutes. We had room in the pan so added our baby potatoes at the same time. By the way - this will make enough brocolli for 4 ramkins - I only show 2 in the photo.

The verdict: We were very happy with the way the brocolli "set". It was very bland -definately needed salt, but the brocolli flavor was very distinct. This is an idea that we will continue to experiment with - we are thinking of doing 1/2 carrot, 1/2 brocolli, or a layer of shredded beets, or, or, or??? Another possibility is creating a blue cheese sauce to serve on the side, or even in the mixture, or, or, or??? Although cooking this on the stove top worked just fine for the 2 of us, often we need 20plus servings of something, so we will experiment with a hot water bath, covered with foil - in the oven next time!

Anyway, when experimenting in the kitchen - it is always a good idea to also serve tried & true dishes as well... just in case...

So last night we had marinated lamb chops. These are small chops - you have to take your very sharp knife and trim off ALL the fat. Marinate overnight (we couldn't get fresh ingredients, so ended up using a prepared lamb marinade, which was just fine!). Lamb chops - broil on high for 3 minutes each side and then put under a tinfoil tent for a few minutes to finish cooking. It is important not to overcook lamb! Mint jelly on the side is always tasty with lamb!

The boiled potatoes. And, Vogel salad - a small green salad typical in Austria. I love this particular salad mixed with a mixture of 80% pumpkin seed oil and 20% balsamic vinegar, sprinkled with a tiny bit of salt. Pumpkin seed oil is a very dark, rich oil - if you have never tried it - I highly recommend that you do - you can find it in the USA in specialty grocery stores or by mail order. It is really worth looking for!


Wednesday, December 20, 2006

Grilled Steaks/Asperagus


Truth be told - I always am so excited to sit down and eat that I forget to take a photo beforehand for my food blog. Even though I don't post much here, believe me, I am eating!


My DH wanted to bring me out to eat this summer and I begged off - our son is 3 and, well, enough said. Instead, I went to the butcher and got these really yummy steaks - I think they were rib eyes, but now I can't remember exactly. The display case only had very large steaks, so I asked for some smaller ones and was rewarded with these beauties. Always worth asking, you know? A special steak for a special dinner (in other words, it wasn't cheap, but it was worth it!).

The menu:

Grilled steak - to your liking

Grilled asperagus - put the asperagus in a big ziplog bag early in the day with balsamic vinegar. Grill for about 10 minutes - turning occassionally - and sprinkle parmasean cheese on top just before serving.

Sauteed mushrooms - my DH loves these... I steam sliced onions and mushrooms (put a little water in a frying pan and cover the pan - medium heat or else it will take forever). This takes probably about 10 minutes (guess what - about the same amount of time as the asperagus!). When they are nice and soft I stir in stir fry sauce.

Scalloped potatoes - from a box (shhh)

Green salad

Baked bread

And - I love horseradish sauce for my steak, plus a big slice of herbed butter on top, mmmm! I fed my son before we ate and he had a wonderful time playing while we enjoyed our dinner!

Friday, September 22, 2006

Easy Mac & Cheese


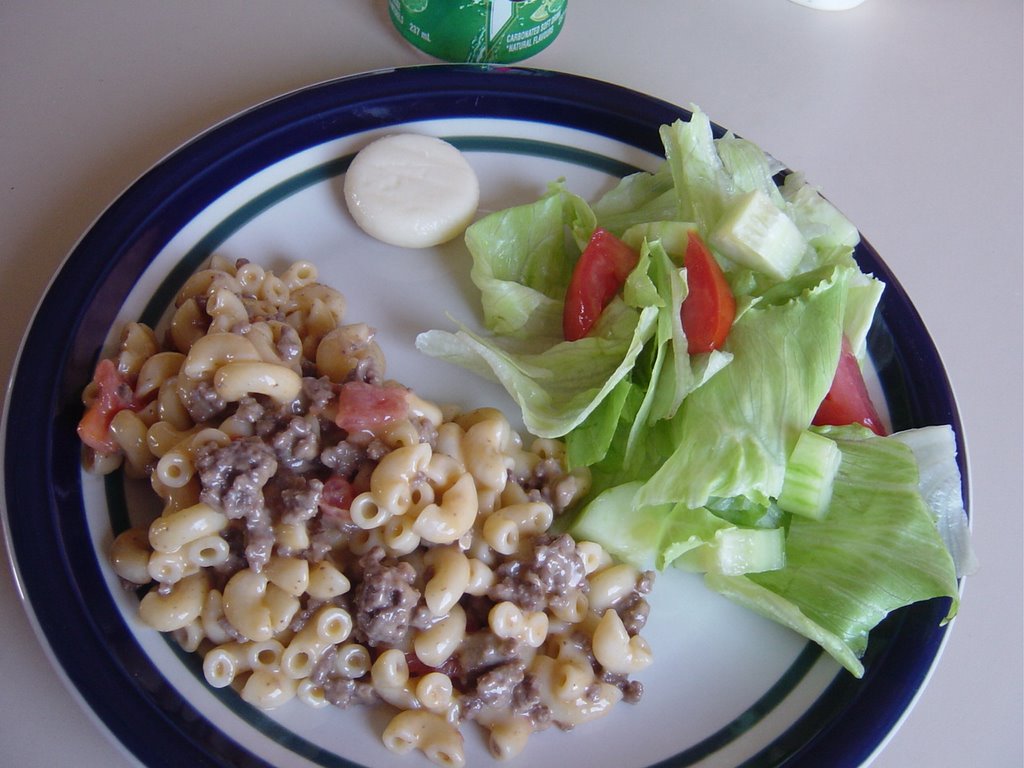
What do you do with 1/2 a can of cheese soup? Make macaroni & cheese! Mix your 1/2 can of soup with 1/2 can of milk and heat on the stove. When hot - pour over cooked elbows. I scrambled the hamburger and tomatoes together in a frying pan. Stir everything together - yum! Really, cheese soup makes the best macaroni & cheese! Served with a salad and mini cheese - a perfect lunch! If you have kids that love cheese/mac - try this (you can skip the hamburger and tomatoes).

Friday, September 01, 2006

Cheesy Porkchop


Here is a simple porkchop recipe...

Spray the bottom of the pan with cooking spray. Add chopped potatoe and a few slices of onion and a mushroom or two if you have some! I like potatoe and was ever hopeful that my Little Boy might eat some, so I put in 2 potatoes.

Heat 1/2 a can of cheese soup on the stove with 1/2 can of water. You need to heat it up to get it to mix altogether. Pour most of the soup over your potatoes/onion. Put the porkchop on top - add some salt and pepper. Spoon the rest of the soup on top of the porkchop (you should have about 2-3 TBS left over which is perfect for 1 chop). Sprinkle the top of the chop with breadcrumbs, cover everything with tinfoil and put into the oven for 1 hour at 375.

OK - so here are my results for tonight... I didn't have any tinfoil so I used a pan cover that didn't exactly fit. So - the sides dried out a bit - you can see that in the foil (thank goodness for that cooking spray stuff because the pan was still a cinch to clean!). And - I cut the potatoes a tad too big - I should have chopped them just a bit smaller because parts of them still had a tiny tiny bit of a crunch and I like my potatoes cooked. But - it could be because I didn't have tinfoil so things didn't steam like they usually do.

I had some sauteed zuchinni with dinner. Would have been good with some applesauce, but since I just had that thought now and dinner is long over - well, next time! I was hoping to have some salad too, but that never got made today. Looks like salad tomorrow at lunch then because I have lots of lettuce to use up and one of my neighbors gave me some yummy tomatoes.

Obviously - you can easily adjust the amounts for more people.

And, now I have 1/2 can of left-over cheese soup to mix in with some elbow noodles and scrambled hamburger with some chopped tomatoes for lunch tomorrow...
 Posted by Picasa

Cheap Steak


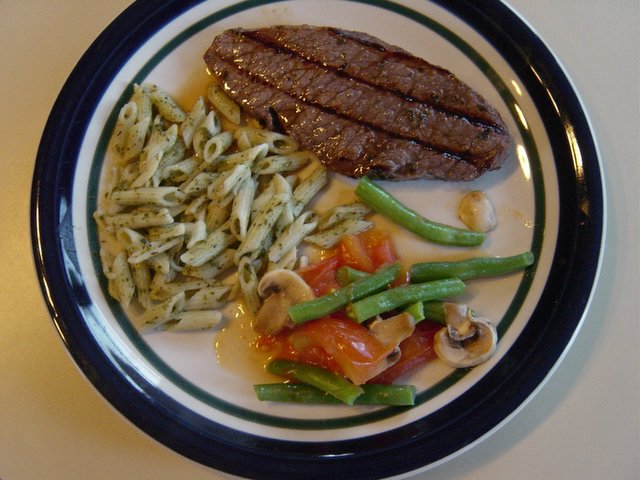
A bargain piece of steak - $1.35 Canadian for this piece. Yes, a marinating steak. So, I put it in the zip lock baggie first thing in the morning and marinated it in Italian salad dressing for 12 hours. I think it could have used another 12 hours of marinating, because it was still a little tough.

Still, I usually like these thin steaks because they only take 5 minutes to grill on my little double-sided grill.

But - all in all, not a BAD dinner. When in doubt about something, be sure to prepare other things that you know you like... pesto pasta left-overs from a mix and steamed veggies even out the plate.

And, since it is getting colder out, I've put my fish-y plates away until next summer.
 Posted by Picasa

Saturday, July 22, 2006

Outdoor kitchen


Well - I wrote this post in July and am just now realizing it is still a draft - I never posted it! Oops! Well, I think it is still worth posting so here's something for you to think about for next summer...

Too hot to cook? Move your kitchen outside! Here is my set-up...

The "frame" I got from the Sears catalog (yes, we still have that in Canada - grin!) - the camping section. I am sure you can get something similar elsewhere - depends what you want to spend. I think mine was about $100 Canadian - but don't quote me!

Microwave on the bottom, single electric burner and Hamilton Beach grill (in an earlier post I referred to it as my mini George Foreman grill, but it isn't!). Keep everything else clear for your work surfaces. I was in Wal-Mart the other day and saw several nice grills similar to mine - and they have single AND double electric burner units too! My husband laughs at my grills (I have a few different sizes, but this little one is one of my favorites). I am just not one of those huge gas grill fans - the small electric ones suit me just fine. They are fairly easy to clean if you spray them liberally with cooking spray. AND - they grill the top and bottom of the food at the same time so you don't have to bother with turning food as it cooks. What's not to like? Oh - and the fat runs off into a little drip pan - it has to be healthy, right?

If you scroll through some of my recent posts - you will see that for almost every dinner used 1 microwave, 1 electric burner and 1 grill. Gee, I wonder why! It's hot - so don't make your house hotter by cooking inside - move it outdoors!

One note: the electric burner I have is fine for a small sauce pan. When I boil corn - I use my real stove inside so I can use a big pan. Remember - I have a 3 year old running around so you never can be too safe...

Before my son was born my DH and I had a weekend in Newport, RI. We toured a few of the "summer cottages" (more like mansions) while there - these are old(? - maybe late 1800's or 1920's - I am soooo bad at details) summer estates of the rich which now offer tours. Anyway - these old houses had the most amazing summer kitchens. First - the heat - of course. Think about this - baking loaves of bread, cookies, cakes, pies, roasts - these people used their ovens all day long, except they weren't nice, insulated ovens. Oh no - they had huge cast iron wood stoves. Hot, hot, hot. So - the kitchens were removed from the main house. Another reason was to keep the kitchen away from the house in case there was a fire. I grew up in an antique house and it too had a summer kitchen. So, maybe in my very small scale, I am just following in the footsteps of those before. Why re-invent the wheel? It worked then, it works now!

Thursday, July 20, 2006

Shrimp stir-fry


You might not be able to see it - but there IS a fair amount of shrimp in this stir-fry.

1st - Minute Rice. I am a HUGE fan of jasmine rice, but I was in a rush tonight and a 5 minute rice was sounding pretty good to me. I put the rice on and then fiddled around with the stir-fry and when that was done, so was the rice.

2nd - take a big handful of frozen, pre-cooked shrimp out of the freezer and put that in the strainer under running cold water to defrost. I love healthy convenience foods and this shrimp rates pretty high with me - it is also great on top of green salads... Maybe I do pay a little more for my food, but consider this - it is always cheaper than 1 pre-made frozen dinner and I get alot more usage out of my purchase!

3rd - I put some frozen stir-fry mixed vegetables in a bowl with some freshly chopped mushrooms and a handful of fresh bean sprouts - added about 2 tsp. of water, put saran wrap on top and microwaved them for 1 1/2 minute (this is a single portion - so if you are making more - microwave longer!).

4th - Heat stir-fry oil (or any oil for that matter, but I like flavored stir-fry oils) in my frying pan. Add the shrimp, a handful of unsalted peanuts and the left-over vegetables (green beans and onions) from the other night. After about 2 minutes - to get the shrimp warm - I added the other veggies that I already microwaved. Stir in some Hoison sauce and vegetable stir fry sauce to taste - hoison sauce tends to be sweet, so just a bit. If you aren't used to cooking with sauces - experiment, add slowly and taste as you go along. You can make your dish saltier by adding a bit of soy sauce. Or - a nice citrus flavor is a bit of orange juice. Play! Stir it all together and let simmer for about 1 minute.

All done and pretty tasty considering that it took me all of about 10 minutes total to make!

A side note - I go grocery shopping 2X a week. I usually shop for small portions and don't mind asking the butcher to break down big packages of meat into 1 portion. Also, when I buy mushrooms - I will buy just 6 or so at a time and bean sprouts - just a tiny handful. If you want ginger, you can break a bud off the entire stalk. Buying just a little tiny bit adds so much fresh flavor to your cooking and really only costs about twenty-five cents! However, there are some things that you can't just buy one piece of - like celery - so that is where the pre-packaged frozen veggie mixes come in very handy! I just add my fresh stuff into the mix. Shopping 2X a week is faster for me, gives me time to think about what I want to cook and what I need, and also, I feel that my veggies are fresher! By mid-week I am a bit tired of whatever veggie I got earlier in the week so it's nice to go back to the store for more variety!

Oh! And I am not always in a rush - it is just that my son and I have had lessons all this week and don't get home until 6 pm, which is very late to start dinner, considering we usually eat at 5:30 and he goes to bed at 8. I've been giving him a peanut butter sandwich and apple juice at 4:30 to tide him over!


Tuna tips for hot weather


Tuna sandwich for lunch today... and my big tuna tip for hot weather is to keep a few cans of tuna in the fridge. Usually when you make up tuna you want to eat it right away - so if you keep it in the fridge it is already nice and chilled.

I usually don't have time to chop a bunch of stuff for my tuna - so here is what I do - I use 2 heaping teaspoons of mayo and 1 heaping teaspoon of relish. Toast my bread and spread it with dijon mustard mixed with mayo. Add a slice of American cheese.

And, I am not a huge fan of potatoe chips, but I do like tostido chips with salsa. Last, but not least, I love a dill pickle spear on the side!

Wednesday, July 19, 2006

Pork Chops


Thin boneless pork chops always make a nice, jiffy meal! Let's see - start the rice 1st - it takes 20 minutes (a mushroom flavored mix). Then, set the pan to boil for the corn. Pre-heat the grill for 5 minutes. Put your corn in to cook (I cook mine for about 8 minutes) and grill your pork chop for a little less time. Rice should be done now. Ta-da - Dinner!

When I put the porkchop on the grill I like to put terraki sauce on it. Mmmm. Oh sure, it is nice to read all these recipes with home-made sauces and marinades, but let's be realistic here... chances are I am missing 1/2 the ingredients, don't have time to "make" a recipe, might buy the ingredients - but then loose the recipes... Ummm - my fridge is full of all kinds of wonderful sauces, glazes, marinades, etc. They come in all kinds of different flavors and take all of 2 seconds to put on your cooking food. Low stress cooking at its finest - and it tastes good too!


An added bonus - my son's dinner is done at the same time too. I boiled his hot dog in the same pan as the corn. One less pan to clean, right? He loves corn on the cob - I think he ate every single kernal of corn off his cob!

Chicken Salad Lunch


Remember that grilled chicken I had 2 nights ago for dinner? Well, I made the left-overs into this yummy salad this morning. Here is a photo (before I doused it with ranch salad dressing). Anyway, it has been so hot I decided to make a cool lunch early in the day before the heat got to me. It was so nice to just open the fridge at lunch time and have this waiting! I make lots of salads and use what I have on hand - avacado and sliced hard boiled eggs are 2 other favorite things to add to a salad.

Cantelope - I ALWAYS cut it as soon as I bring it home from the store. I cube most of it and then slice a few garnish pieces for my own meals. I cube for my 3 year old son who just loves it! And, if it is all cubed and sliced - I use it! Otherwise it is destined for the trash bin because - I don't use it.

Tuesday, July 18, 2006

Sausage dinner


I suppose if you see the fish plate - I am eating alone. Just because you are eating alone doesn't mean that you shouldn't take the time to fix yourself a nice meal. This one only took 15 minutes - start to finish!

1. Preheat my grill. While that is pre-heating, chop my green beans, green pepper and onion. My plate would have had a bit more color if I had used my orange pepper instead, but the green one is older, so I want to use it up!

2. Slice the sausage open (mine were honey/garlic), brush the cut side with brown sugar bar-b-que sauce and put it on the grill. At the same time, put the onion and green pepper in the frying pan, in some butter (I cook with lots of butter) and put the cover on it - medium-low heat.

3. After about 2 minutes, stir the veggies, add more butter if needed and add the chopped green beans. Put the cover back on and keep cooking for about another 7 minutes - less if you like your green beans super crispy, but I like mine cooked a bit. That means your veggies have been cooking for about 9 minutes, so your sausage should be done too.

4. Left over noodles from last night - while the other stuff is cooking I mixed in a little milk and butter and put this in the microwave (with a cover) for about 2 minutes.

Everything is done! I spoon the extra butter from the frying pan over my veggies. Also, I have a little grill where the cover closes on top of the food (so the food has grill contact on top and bottom), so I don't need to turn my food. I made a double batch of veggies so I will have those left-over to start my meal with for tomorrow.